How to use a Wood CNC Router for box joints?
Leave a message

Hey there, woodworking enthusiasts! I'm a supplier of Wood CNC Routers, and today I'm stoked to share with you how to use a Wood CNC Router for box joints. Box joints are not only super strong but also add a sleek, professional look to your woodworking projects. Whether you're making a jewelry box, a cabinet, or a simple storage container, box joints can take your work to the next level.
Getting to Know Your Wood CNC Router
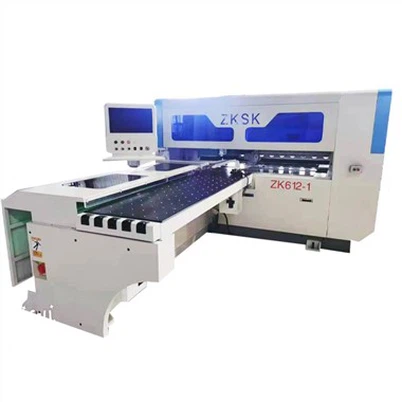
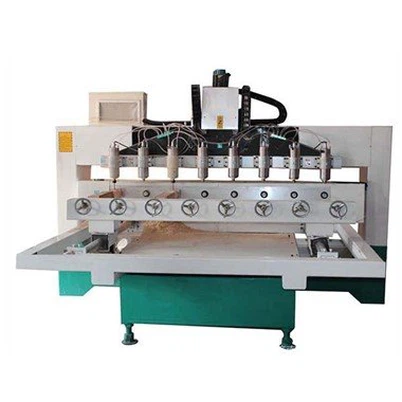
First things first, let's talk a bit about the Wood CNC Router. If you're in the market for a reliable machine, check out our 1325 Model Cnc Router Machine. It's a beast of a machine, perfect for creating precise box joints.
A Wood CNC Router works by using computer numerical control to guide the router bit through the wood. You input a design into the computer, and the machine does the rest. It's like having a super skilled woodworker at your beck and call, but without the hefty salary!
Preparing Your Materials and Machine
Before you start cutting those box joints, you need to get your materials and machine ready. Here's what you'll need:


- Wood: Choose a high-quality wood that's suitable for your project. Hardwoods like oak, maple, or cherry work great for box joints. Make sure the wood is flat and free of any knots or defects.
- Router Bit: Select a router bit that's the right size for your box joints. A 1/4-inch straight bit is a good choice for most projects.
- Safety Gear: Always wear safety glasses, ear protection, and a dust mask when using a CNC router. The machine can generate a lot of dust and noise, so it's important to protect yourself.
Once you have your materials, it's time to set up your machine. Here's how:
- Install the Router Bit: Carefully install the router bit into the collet of the CNC router. Make sure the bit is tightened securely and that it's centered.
- Zero the Machine: Use the control panel to zero the machine's axes. This will ensure that the machine knows where it is in space and that your cuts will be accurate.
- Load Your Design: Use a CAD/CAM software program to create or import your box joint design. Make sure the design is set to the correct dimensions and that it's oriented correctly on the wood.
- Secure the Wood: Use clamps or double-sided tape to secure the wood to the machine's table. Make sure the wood is flat and that it won't move during the cutting process.
Creating Your Box Joint Design
Now that your machine is set up, it's time to create your box joint design. There are a few different ways to do this, but one of the easiest is to use a CAD/CAM software program. Here's how:
- Open Your CAD/CAM Software: There are many different CAD/CAM software programs available, but some popular ones include Fusion 360, Vectric Aspire, and Carbide Create. Open your software and create a new project.
- Draw Your Box Joint: Use the software's drawing tools to create your box joint design. You can draw the joints manually or use a pre-made template. Make sure the joints are the right size and that they fit together properly.
- Generate the Toolpath: Once you've created your design, use the software's toolpath generation feature to create the toolpath for your CNC router. This will tell the machine where to cut and how deep to cut.
- Save and Transfer the File: Save your toolpath file in a format that your CNC router can read, such as G-code. Then, transfer the file to your machine using a USB drive or a network connection.
Cutting Your Box Joints
Now that your design is ready, it's time to start cutting your box joints. Here's how:
- Load the Toolpath File: Use the control panel on your CNC router to load the toolpath file that you created in your CAD/CAM software.
- Set the Cutting Parameters: Adjust the cutting parameters on your machine, such as the feed rate, spindle speed, and depth of cut. These parameters will depend on the type of wood you're using and the size of your router bit.
- Start the Machine: Once you've set the cutting parameters, start the machine and let it do its thing. The machine will automatically cut the box joints according to your design.
- Monitor the Cutting Process: Keep an eye on the cutting process to make sure everything is going smoothly. If you notice any issues, such as the wood moving or the router bit breaking, stop the machine immediately.
- Remove the Wood: Once the cutting process is complete, turn off the machine and carefully remove the wood from the table. Use a sandpaper or a file to smooth any rough edges or burrs.
Assembling Your Box
Now that you've cut your box joints, it's time to assemble your box. Here's how:
- Apply Glue: Apply a thin layer of wood glue to the joints of your box. Make sure the glue is evenly distributed and that it covers the entire surface of the joints.
- Fit the Pieces Together: Carefully fit the pieces of your box together, making sure the joints are aligned properly. Use clamps to hold the pieces in place while the glue dries.
- Let the Glue Dry: Let the glue dry for at least 24 hours before removing the clamps. This will ensure that the joints are strong and that the box is stable.
- Sand and Finish the Box: Once the glue has dried, use a sandpaper or a file to smooth any rough edges or burrs. Then, apply a finish to the box, such as paint, stain, or varnish, to protect the wood and give it a professional look.
Troubleshooting Common Issues
Even if you follow all the steps correctly, you may still run into some issues when using a Wood CNC Router for box joints. Here are some common issues and how to troubleshoot them:
- Poor Cut Quality: If your cuts are rough or uneven, it could be because the router bit is dull or the cutting parameters are set too high. Try replacing the router bit or adjusting the cutting parameters.
- Joints Don't Fit Together: If your joints don't fit together properly, it could be because the design is incorrect or the wood has warped. Try adjusting the design or using a different piece of wood.
- Machine Stops Cutting: If the machine stops cutting during the process, it could be because the router bit has hit an obstruction or the machine has overheated. Stop the machine immediately and check for any obstructions. If the machine has overheated, let it cool down before continuing.
Conclusion
Using a Wood CNC Router for box joints is a great way to take your woodworking projects to the next level. With a little practice and patience, you can create beautiful, strong box joints that will impress your friends and family. If you're interested in purchasing a Wood CNC Router for your woodworking projects, please don't hesitate to contact us. We're here to help you find the right machine for your needs and to provide you with all the support and guidance you need to get started.
References
- "Woodworking with CNC Routers" by John Smith
- "CNC Router Basics" by Jane Doe
- "Box Joints: A Woodworker's Guide" by Bob Johnson