How to convert a 2D design into a CNC program for a Wood CNC Router?
Leave a message

Converting a 2D design into a CNC program for a wood CNC router is a crucial process that bridges the gap between creativity and precision manufacturing. As a wood CNC router supplier, I've witnessed firsthand how this process can transform a simple design on paper into a tangible, high - quality wooden product. In this blog, I'll guide you through the step - by - step process of converting a 2D design into a CNC program for your wood CNC router.
Understanding the Basics
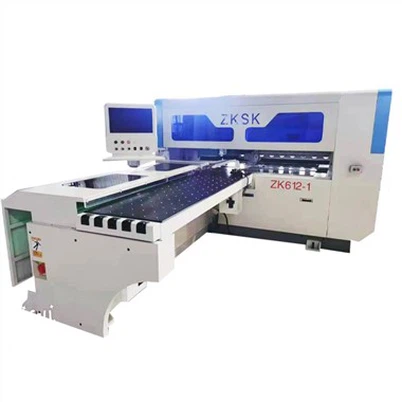
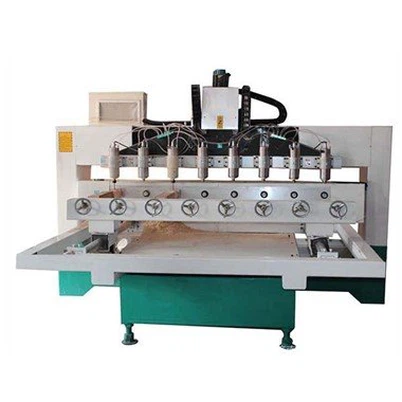
Before diving into the conversion process, it's essential to understand the key components involved. A wood CNC router is a computer - controlled machine that uses a router bit to cut, carve, and shape wood. The CNC (Computer Numerical Control) system controls the movement of the router bit based on a pre - programmed set of instructions. A 2D design, on the other hand, is a flat representation of your intended wooden product, typically created using design software such as Adobe Illustrator, AutoCAD, or SketchUp.
Step 1: Choose the Right Design Software
The first step in converting a 2D design into a CNC program is to choose the right design software. The software you select should be compatible with your wood CNC router and offer the necessary features for creating detailed 2D designs. Some popular design software options for woodworking include:
- Adobe Illustrator: A powerful vector - based design software that is widely used for creating detailed 2D graphics. It offers a wide range of tools for drawing, editing, and manipulating shapes, making it ideal for creating intricate woodworking designs.
- AutoCAD: A professional - grade design software that is commonly used in the engineering and manufacturing industries. It provides advanced features for creating precise 2D and 3D models, including accurate measurements and detailed annotations.
- SketchUp: A user - friendly design software that is popular among woodworkers and DIY enthusiasts. It allows you to create 3D models quickly and easily, and also offers a 2D drawing mode for creating flat designs.
Step 2: Create or Import Your 2D Design
Once you've chosen the right design software, it's time to create or import your 2D design. If you're creating a new design, start by sketching out your ideas on paper or using the software's drawing tools. Make sure to include all the necessary details, such as dimensions, shapes, and patterns.
If you already have a 2D design in a different format, such as a PDF or JPEG file, you can import it into your design software. Most design software programs support importing various file formats, allowing you to work with existing designs easily.
Step 3: Prepare Your Design for CNC Machining
Before converting your 2D design into a CNC program, you need to prepare it for CNC machining. This involves several important steps:
- Scaling and Sizing: Ensure that your design is the correct size and scale for your wood CNC router. Measure the dimensions of the wood material you'll be using and adjust your design accordingly.
- Cleaning Up the Design: Remove any unnecessary lines, shapes, or elements from your design. This will make the CNC program more efficient and reduce the risk of errors during machining.
- Adding Toolpaths: Toolpaths are the paths that the router bit will follow during machining. You need to define the toolpaths for your design, including the cutting depth, feed rate, and spindle speed. Most design software programs offer toolpath generation tools that can help you create accurate toolpaths based on your design.
Step 4: Convert Your Design into a CNC Program
Once your design is prepared for CNC machining, it's time to convert it into a CNC program. This is typically done using CAM (Computer - Aided Manufacturing) software. CAM software takes your 2D design and generates a set of instructions (G - code) that the CNC router can understand.
Here are the general steps for converting your design into a CNC program using CAM software:
- Import Your Design: Open your CAM software and import your 2D design file. Make sure the design is correctly aligned and scaled in the software.
- Select the Router Bit: Choose the appropriate router bit for your design and the type of wood you'll be using. The router bit size and shape will affect the cutting quality and the overall appearance of your finished product.
- Generate Toolpaths: Use the CAM software's toolpath generation tools to create the toolpaths for your design. You can choose from a variety of toolpath types, such as contouring, pocketing, and drilling, depending on the requirements of your design.
- Set Machining Parameters: Set the machining parameters, including the cutting depth, feed rate, spindle speed, and coolant flow (if applicable). These parameters will determine the speed and quality of the machining process.
- Simulate the Machining Process: Before sending the CNC program to the router, it's a good idea to simulate the machining process using the CAM software. This will allow you to visualize the toolpaths and check for any potential errors or collisions.
- Generate G - code: Once you're satisfied with the toolpaths and machining parameters, generate the G - code for your design. The G - code is a set of instructions that tells the CNC router how to move the router bit and perform the machining operations.
Step 5: Transfer the CNC Program to Your Wood CNC Router
After generating the G - code, you need to transfer the CNC program to your wood CNC router. Most CNC routers support transferring programs via USB, Ethernet, or Wi - Fi. Here's how you can transfer the CNC program to your router:
- Connect Your Router: Connect your wood CNC router to your computer using the appropriate cable or wireless connection.
- Open the CNC Control Software: Open the CNC control software on your computer. This software allows you to communicate with the CNC router and send the G - code program.
- Load the G - code Program: In the CNC control software, load the G - code program that you generated using the CAM software. Make sure the program is correctly loaded and the settings are compatible with your router.
- Set the Origin Point: Set the origin point on the wood material. The origin point is the starting point for the machining process, and it's important to set it accurately to ensure the correct positioning of the design on the wood.
- Start the Machining Process: Once everything is set up, start the machining process. The CNC router will read the G - code program and move the router bit according to the toolpaths you defined.
Step 6: Monitor and Adjust the Machining Process
During the machining process, it's important to monitor the router and make any necessary adjustments. Here are some things to keep in mind:
- Check the Cutting Quality: Periodically check the cutting quality of the router bit. If you notice any issues, such as rough edges or uneven cuts, you may need to adjust the machining parameters or the router bit.
- Monitor the Wood Material: Keep an eye on the wood material to ensure that it doesn't move or shift during the machining process. If the wood moves, it can cause the router bit to cut in the wrong place, resulting in a defective product.
- Make Adjustments as Needed: If you encounter any problems during the machining process, such as a tool breakage or a collision, stop the router immediately and make the necessary adjustments. You may need to modify the G - code program or the machining parameters to correct the issue.
Conclusion
Converting a 2D design into a CNC program for a wood CNC router is a complex but rewarding process. By following the steps outlined in this blog, you can transform your creative ideas into high - quality wooden products with precision and accuracy.
As a wood CNC router supplier, we offer a wide range of 1325 Model Cnc Router Machine that are suitable for various woodworking applications. Our routers are equipped with advanced features and reliable components, ensuring smooth and efficient machining operations.
If you're interested in purchasing a wood CNC router or have any questions about converting 2D designs into CNC programs, please feel free to contact us. Our team of experts is always ready to assist you and provide you with the best solutions for your woodworking needs.


References
- "CNC Machining Handbook" by Peter Smid
- "Woodworking with CNC Routers" by Scott Landis
- Various online resources and tutorials on wood CNC routing and design software